2021-11-21
River Setup Guide (continously updated)
Welcome to my unofficial river setup guide! This guide currently targets the upcoming 0.3.0 release (but not entirely, as I haven't had the time and energy to update everything yet) and is continously updated. Since not everyone is running the latest version, let alone git master, I will also provide some information for older versions were necessary.
This guide mostly targets new river users and as such explains basic river concepts and tries to be a starting point for creating your own configuration and workflows. Obviously I can not cover everything in excessive detail, however this should contain everything you need to get comfortable with river. This also includes a few tips and tricks. Feel free to send me suggestions via mail or IRC.
I recommend reading this in order, as sections continuosly built upon previous sections. However for your convenience, here is a table of contents which allows you to jump to individual sections directly:
-
Let's get started!
- Basic requirements
- How to start river
- Display-Manager integration
- Auto-login
-
Where is the Configuration?
- A quick word on defaults
- The
initscript - Introducing
riverctl
-
Actions and Keybind Basics
- How to use
riverctl - Mapping actions to keys
- Modes
- How to use
-
Window Management Basics
- Window list
focus-viewswapzoom
-
Layouts
- Basic introduction
default-layoutoutput-layoutsend-layout-cmd
-
Manipulating Floating Windows
- Moving
- Resizing
- Pointer binds
- Tags
- Rules
- Dealing with multiple Outputs
- Appearance
- Interoperability and Integration
-
Useful Programs and Widgets
- Terminals
- Bars
- Notifications
- Fun
- Gallery
Let's get started!
I'll leave out the details of installing river. I'd love to help you with that, but it will be different based on your Linux distribution and I simply can't know them all. All I'll say is that you might want to build it from source, which is considerably less scary than it sounds. You also can always come to #river on libera.chat to get help with specific issues, the people who hang out there know stuff about things.
For river to run, you will also need either logind, elogind or seatd. If you are using systemd, then it already takes care of this for you. If not, you also need something to set the $XDG_RUNTIME_DIR, like rundird. If you have previously run a graphical desktop on your system, than all of this is likely already set up.
When you have installed river (which should also include riverctl and rivertile and all the man pages), you are now faced with the question of how to start it.
The simplest method to start river is to do it manually. Just log into a TTY, type river into your shell and press Enter.
If you prefer to have a fancy graphical login prompt you will need to use a display manager. River does not officially support display managers, but getting them to work is trivial. You only need to define a river session, which can be done by creating a file called river.desktop in /usr/share/wayland-sessions/ with the following content.
[Desktop Entry]
Name=River
Comment=A dynamic tiling Wayland compositor
Exec=river
Type=Application
Now river should be a select-able session in your display managers login screen.
A fine alternative to the classical display managers is greetd, which also allows you to have graphical login prompt as well as auto-login. I use it on my own system to automatically start river on boot and it works really well for that and it is a lot cleaner than the agetty plus bash profile hack most people use for automatically loging into a graphical session. Installation and setup is somewhat invasive, so I can only recommend it to people who are willing to tinker and thoroughly read the documentation. As such I will not explain how to use it, as I know someone will just copy-paste that without reading or understanding anything.
Where is the Configuration?
When river starts up, its initial, default configuration is so bare bones, it literally only defines the colour scheme and the thickness of the window border. Nothing else, no keybinds, no pointerbinds, no input configuration, no auto start, no filters, absolutely nothing at all is defined. All you will see is a solid wall of #002b36, making you feel like river stares directly into your soul, judging your very essence. You can not hide. River sees all.
Do not despair though, the familiar TTY switching keybinds are hard coded.
So where is the configuration? Ok, this might shock you: River does not have a configuration file!
The one and only thing river wants to do on its own during startup is executing a file at $XDG_CONFIG_HOME/river/init. This file usually is a shell script and will be your starting point for getting river to behave like you want. The next thing you need to know about is riverctl, a little companion program which can be used to send commands to river. Some of these commands make river act in certain ways, others change configuration. So the canonical way to configure river, you merely call that program to send commands to river from the init script.
You of course also use riverctl directly in your shell. I will get into the basics of how to use it in the next section. What I'd like to highlight now is that all of rivers configuration is at runtime. This means that all commands you see in this article or stitch together on your own are not limited to the init. They can be run at any time, which is very flexible.
In rivers repository you will find an example shell script init, which you can copy if you like. But this article will give you enough information to be able to create your own init from scratch. It's pretty simple once you get the basics.
Actions and Keybind Basics
River has multiple actions you can call using riverctl. As an example, if you want to exit river, you can use the exit action like this.
riverctl exitOne very useful action is spawn, which will cause river to execute a given shell command. This can be used to launch various things.
riverctl spawn firefoxNote the spawn action only takes a single argument, so if the command you want river to execute contains multiple tokens, for example when it has a few flags, you will need to quote it.
riverctl spawn "firefox --flag-one --flag-two"This alone is pretty neat, but what makes it useful is the ability to bind actions to a key plus modifier combination, using the map action. Let's bind the two actions I have explained above to Super+e and Super+f.
riverctl map normal Mod4 E exit
riverctl map normal Mod4 F spawn "firefox --flag one --flag-two"
Let's explore what is going on here.
The first parameter of our map example here is normal. This is the name of the mode of the keybind. I will explain modes once I have covered the rest of the map action.
The second parameter is Mod4. This is the modifier. Mod4 is the canonical name of the modifier activated when pressing the super key (also sometimes called "windows key" or "logo key"), so putting it here simply means that you need to press and hold super when pressing the key you bound the action to to fire this keybind.
Here is a list of all possible modifiers.
| Modifier | Canonical Name |
|---|---|
| None | No modifier |
| Shift | |
| Lock | Capslock |
| Control | |
| Mod1 | Alt, "Meta" |
| Mod2 | |
| Mod3 | |
| Mod4 | Super, "Logo", "Windows" |
| Mod5 | AltGr |
You can combine multiple modifiers. For example if you wanted to create a keybind where both super and shift need to be pressed, you can use Mod4+Shift as modifier parameter.
riverctl map normal Mod4+Shift F spawn "firefox --new-window"The default init makes heavy use of this, because it tries to bind most available actions to keybinds. Mod4+Control+Shift or even Mod4+Mod1 can be found in it. You do not have to go that far, but the option is there if you need it.
The third parameter is the name of the key you want to bind the action to. You can bind actions not just to alphanumeric keys but to pretty much every key on your keyboard. Just note that some keys have names that are not easy to guess. For those cases I recommend using xkbcli interactive-wayland, which will spawn a window and then print all key events to the terminal that are send to that window, including the key names.
And after the key, you can just specify the action you want to bind, just as if you were calling it directly. This works for all of rivers actions.
Now let's return to modes. River allows for multiple distinct sets of keybinds, which is what modes are. The normal mode, which I have used in the example and will use for all other keybinds in this article is rivers default mode, the one that is initially active on startup.
River also defines a second mode, locked, which is automatically entered when a screen locker is active (and automatically left afterwards as well). With this in mind, here is an example shell snippet for binding the volume media keys for both normal and locked mode, so that they can be used during normal operations and when the screen is locked.
for mode in normal locked
do
riverctl map $mode None XF86AudioLowerVolume spawn "pamixer -d 5"
riverctl map $mode None XF86AudioRaiseVolume spawn "pamixer -i 5"
done
You can also create your own modes with the declare-mode action and assign keybinds to them. To enter the mode you defined, you can use the enter-mode action. Note that you can not enter or leave locked mode with this action, for obvious reasons.
Here is an example shell snippet that defines a launcher mode, which can be entered with Super+d, allowing you to spawn a few applications by hitting a letter key without modifier and which can be left with Escape.
riverctl declare-mode launcher
rivrectl map normal   Mod4 d      enter-mode launcher
riverctl map launcher None f      spawn firefox
riverctl map launcher None g      spawn gimp
riverctl map launcher None n      spawn nautilus
riverctl map launcher None Escape enter-mode normal
Before we leave this section, I would like to point out explicitly what the attentive reader will already have guessed: The set of actions you can bind to keys and the set of actions you can call directly with riverctl are equal. Everything you can map to a keybind can also be done directly with rivrectl and vice versa.
Window Management Basics
Rivers window management model is very simple. All windows on an output are simply stored in a list. I will cover that data model first and explain later how that leads to the actual coordinates and sizes of windows on screen. Bear with me, it will all make sense in a minute.
Let's imagine an output with five windows. For the sake of illustration I have given each of these windows names, A, B, C, D and E. And for the snake of illustration I have drawn them all side-by-side, connected by little arrows indicating the lists "direction" (and if you think that joke was bad, be happy you haven't met me IRL yet).
Windows generally have three states relevant for window management. The most of important of which is focused or not focused. I have highlighted the focused window in red. Only a single window per output can be focused.
The second state is visible or hidden, in the graph illustrated by v or h. Do not worry yet about what makes a window visible or hidden, we'll get to that when we cover tags.
And finally, a window can be tiled or floating, illustrated by the t or f state. Windows which are tiled are subject to the layout generator, while flaoting windows must be managed entirely manually and will always float above the tiling windows.
New windows will by default be attached to the top of the list. However you can also configure river to attach new windows at the bottom, with the attach-mode action.
The window management action used most often is focus-view. It allows you to focus either the next or previous visible window based on the window list (logical direction) or the closest visible window in any direction based on the center point of each window (spatial direction).
In the example init, next and previous are bound to Super+{j,k}. However for me personally in my brain hjkl are hardwired as left, down, top and right, so I prefer spatial direction. Still, logical direction is useful sometimes so I bind them as well.
riverctl map normal Super H focus-view left
riverctl map normal Super J focus-view down
riverctl map normal Super K focus-view up
riverctl map normal Super L focus-view right
riverctl map normal Super N focus-view next
riverctl map normal Super P focus-view previous
How spatial windos focusing works is self-explanatory. However logical window focusing probably needs a bit more explanation. It cycles focus through all visible views, skipping hidden ones, even jumping from tiled to floating and back, wrapping at the end or beginning or the list. Let's call focus-view next a few times and see what happens.
There are two window management actions that manipulate the list, the first of which is swap. It allows you to swap the focused window with another one, again based on either logical or spatial direction.
In the example init swapping is bound to Super+Shift+{jk}. Again, I personally prefer spatial directions.
riverctl map normal Super+Shift H swap left
riverctl map normal Super+Shift J swap down
riverctl map normal Super+Shift K swap up
riverctl map normal Super+Shift L swap right
riverctl map normal Super+Shift N swap next
riverctl map normal Super+Shift P swap previous
Swapping is disabled for floating views, and will skip them when swapping tiled views, because the action would not have any visible effect on them. Let's call swap next a few times and see what happens.
The other action that manipulates the list is zoom. It will move the currently focused window to the top of the stack. If the focused window is already the topmost in the list, it will swap it with the next visible tiled window in the list while keeping the focus at the top of the list.
The example init binds zoom to Super+Return.
riverctl map normal Mod4 Return zoomAs with swap, zoom does not work for floating windows and will skip them. Let's call zoom a few times and see what happens.
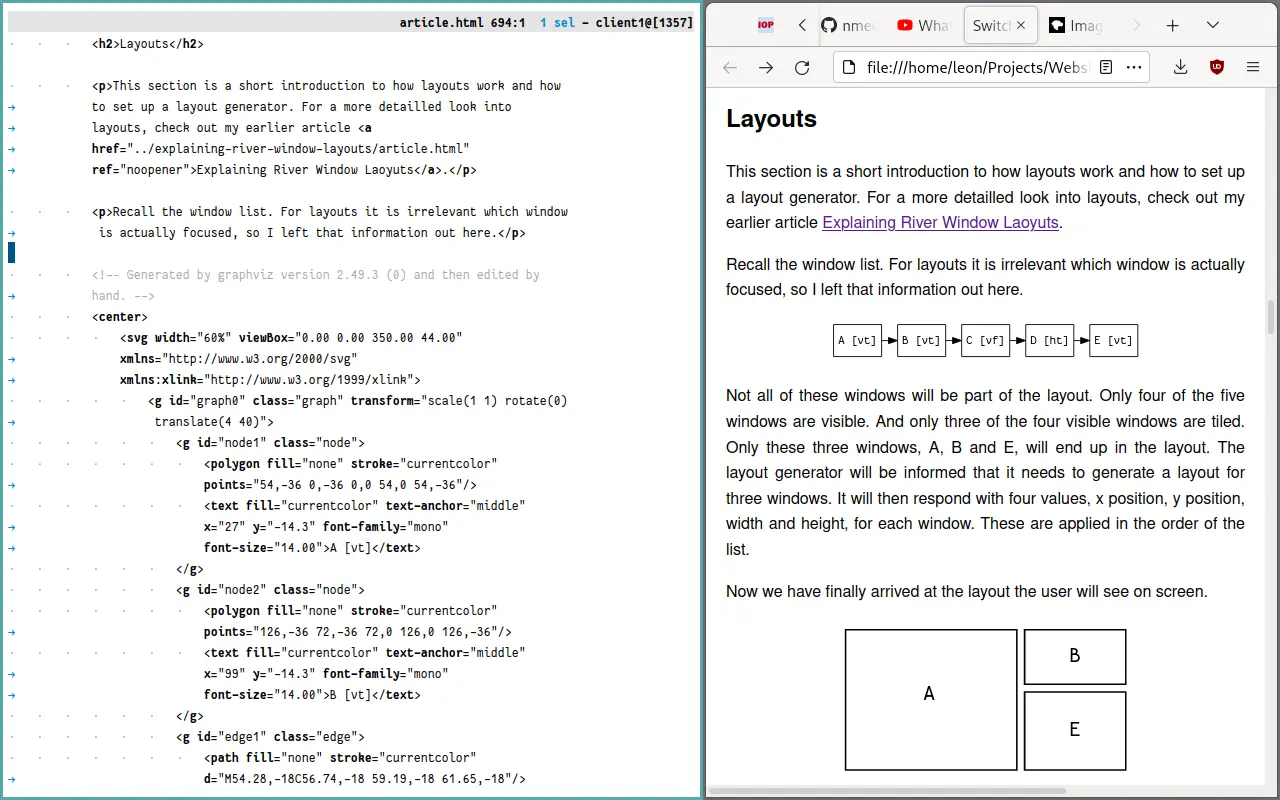
Layouts
This section is a short introduction to how layouts work and how to set up a layout generator. For a more detailed look into layouts, check out my earlier article Explaining River Window Layouts.
Recall the window list. For layouts it is irrelevant which window is actually focused, so I left that information out here.
Not all of these windows will be part of the layout. Only four of the five windows are visible. And only three of the four visible windows are tiled. Only these three windows, A, B and E, will end up in the layout. The layout generator will be informed that it needs to generate a layout for three windows. It will then respond with four values, x position, y position, width and height, for each window. These are applied to the windows in the order of the list.
Now we have finally arrived at the layout the user will see on screen.
How exactly the layout will look like depends on the layout generator in use. A perfectly fine layout generator, rivertile, is shipped with river already, so I will use it as an example for setting up layout generators in general.
Layout generators are daemons, not one-shot programs. So first you will need to start your generator. To tell river to use the layout of the generator you just started you can use the default-layout action, which needs the name of the layout as an argument, which needs the name of the layout as an argument.
riverctl spawn rivertile
riverctl default-layout rivertile
If you have followed the above instructions, all your tiled windows will be laid out by rivertile. If you have used dwm, awesomewm or xmonad in the past, the layout generated by rivertile will look familiar.
Layout generators are flexible. You can send them commands with the send-layout-cmd action. This is commonly used to modify certain values at runtime. Which commands are available depends on your layout generator, here I will just quickly show the ones of rivertile.
Rivertile has three available user commands. The first is main-location, which controls in which direction, left, right, top, bottom, the main area is positioned. If you like to switch this setting often, it makes sense to bind them to keys, like for example the arrow keys.
riverctl map normal Mod4 Up    send-layout-cmd rivertile "main-location top"
riverctl map normal Mod4 Right send-layout-cmd rivertile "main-location right"
riverctl map normal Mod4 Down  send-layout-cmd rivertile "main-location bottom"
riverctl map normal Mod4 Left  send-layout-cmd rivertile "main-location left"
Note that the send-layout-cmd action needs as first parameter the name of the layout you are sending the command. The second parameter is the layout command you want to send. So layout commands consisting of multiple tokens obviously needs to be quoted.
The second available user command is main-count. It controls how many windows are in the main area. The example init binds Super+Shift+{h,l} to send this command.
riverctl map normal Mod4+Shift h send-layout-cmd rivertile "main-count +1"
riverctl map normal Mod4+Shift l send-layout-cmd rivertile "main-count -1"
But rivertile also allows you to set the value directly, which you may find more comfortable. So here is a shell snippet that just uses a loop to set up nine keybindings for directly setting the main count.
for i in $(seq 1 9)
do
    riverctl map normal Mod4+Mod1 $i send-layout-cmd rivertile "main-count $i"
done
And rivertiles final command is main-ratio, which controls how large the main area is relative to the size of the entire screen. It goes from 0.1 up to 0.9 and like the command for the main count can be both set directly and incrementally. The example init binds this to Super+{h,l}.
riverctl map normal Mod4+Shift h send-layout-cmd rivertile "main-ratio +0.05"
riverctl map normal Mod4+Shift l send-layout-cmd rivertile "main-ratio -0.05"
Rivertile is overall pretty simple, layout generators in general can be a lot more complex. There are already a few alternatives and we maintain a list of community layouts in our wiki. I also wrote one, stacktile, which is a bit more flexible and allows you to divide the screen into multiple sub-layouts.
If you like you can also easily create your own layout generator. The best starting point is probably forking rivertile. Unless you want to start completely from scratch, you do not even need to know anything about Wayland. For that I definitely recommend checking out my article dedicated to layout generators I linked in the introduction of this section.
Manipulating Floating Windows
Now that we have covered tiled windows, here is how to manage floating ones. As I pointed out earlier, managing floating windows, meaning setting their position and dimensions, is entirely the responsibility of the user.
A windows floating versus tiled state can be changed any time using the toggle-float action. The example init binds this to Super+Space.
riverctl map normal Mod4 Space toggle-floatRiver remembers the initial startup dimensions of tiled windows and will use them if a tiled window is set to floating for the first time. River will also remember the dimensions of floating windows when they get switched to tiled and back to floating using toggle-float.
There are three actions available specifically for manipulating floating windows, move, resize and snap. The first two should be self-explanatory and snap will move the window against the output edge of the provided direction. Note that Windows can not be moved beyond the borders of outputs. While unusual, this has multiple reasons, related both to design and technical aspects, but I will not go into that here.
The example init binds these three actions to hjkl with various modifiers.
# Remember: Mod4 is Super, Mod1 is Alt
riverctl map normal Mod4+Mod1         H move left  100
riverctl map normal Mod4+Mod1         J move down  100
riverctl map normal Mod4+Mod1         K move up    100
riverctl map normal Mod4+Mod1         L move right 100
riverctl map normal Mod4+Mod1+Control H snap left
riverctl map normal Mod4+Mod1+Control J snap down
riverctl map normal Mod4+Mod1+Control K snap up
riverctl map normal Mod4+Mod1+Control L snap right
riverctl map normal Mod4+Mod1+Shift   H resize horizontal -100
riverctl map normal Mod4+Mod1+Shift   J resize vertical    100
riverctl map normal Mod4+Mod1+Shift   K resize vertical   -100
riverctl map normal Mod4+Mod1+Shift   L resize horizontal  100
Another way to move and resize floating windows are pointerbinds. They allow you to bind two special pointer actions, move-view and resize-view, to a modifier plus mouse button combination. You can setup pointerbinds with the map-pointer action, which works similarly to the map action I already explained, with the exception that only those two special actions are supported. Unfortunaly the names of mouse buttons are not as straight-forward as those of keyboard keys; You can find all button names in /usr/include/linux/input-event-codes.h, starting with the prefix BTN_.
The example init binds move-view and resize-view to Super and the left and right mouse buttons.
riverctl map-pointer normal Mod4 BTN_LEFT  move-view
riverctl map-pointer normal Mod4 BTN_RIGHT resize-view
If you try to move or resize tiled windows, they will be automatically set to floating, however instead of snapping to their previous floating or initial position and dimension, they will start from their current ones.
You can also let windows float automatically based on their app-id or title, using a rule, which will be covered in a later section.
Tags
Now let's find out what controls whether a window is visible or not.
If you have used any other desktop on Linux, you are probably already familiar with the concept of workspaces. River does not have workspaces, it has tags. They seem superficially similar, but are actually quite different.
This is best explained by noting that tags are not containers holding windows, but rather mere properties of windows and of outputs. This distinction matters, because river allows a window to have multiple tags and for multiple tags to be active on one output.
To see which windows are visible, river compares the tags of all windows on an output with the tags of that output. If any of the tags match, meaning they are active both for the window and the output, the window is shown.
Let's look at an example. Here is an output with a few windows. Here tags are illustrated as simple bitfields, with 1 meaning a tag is active and 0 meaning a tag is not active. Views and outputs have 32 tags, but for the sake of brevity this example only considers the first five.
output     001101
window A   000010 <- no matching tags, window not visible
window B   011000 <- 1 matching tag, window visible
window C   000111 <- 2 matching tags, window visible
If that seems a bit too complicated for your taste, don't worry: Rivers tags can be used like regular workspaces with no additional setup.
River allows you to either set or toggle the tags of windows and outputs. The next two paragraphs explaining the corresponding actions may seems a little scary and complex at first, but if you read further, I'll show why they really are not.
Setting tags is straight forward. You use the set-focused-tags and set-view-tags actions for that. They require as parameter the integer number that equals the bit representation of the tags you wish to be active for the output or window.
Toggling is slightly more complicated. You use the toggle-focused-tags and toggle-view-tags actions for that. As a parameter they again require an integer number equaling a bit representation of tags, but this time those active tags get toggled for the output or window.
Now, let me quickly add that those integer numbers are easiely generated, even in bash. Let's take a look at how the example init binds those four actions. It sets upSuper and a number key to activate only that tag for the output, Super+Shift and a number key to activate only that tag for the focused view, Super+Control and a number key to toggle that tag for the output and finally Super+Shift+Control and a number key to toggle that tag for a window.
for i in $(seq 1 9)
do
    tagmask=$((1 << ($i - 1)))
    riverctl map normal Mod4               $i set-focused-tags    $tagmask
    riverctl map normal Mod4+Shift         $i set-view-tags       $tagmask
    riverctl map normal Mod4+Control       $i toggle-focused-tags $tagmask
    riverctl map normal Mod4+Shift+Control $i toggle-view-tags    $tagmask
done
all_tags_mask=$(((1 << 32) - 1))
riverctl map normal Mod4       0 set-focused-tags $all_tags_mask
riverctl map normal Mod4+Shift 0 set-view-tags    $all_tags_mask
You may ask yourself now, why all this complexity? And the answer is because it allows for some interesting and quite useful workflows. Here is an example that is pretty close to how I use tags.
Imagine you are working on some project. You have your editor on tag 1, a terminal where you compile the project on tag 2 and documentation on tag 3. While you are writing code, you are on tag 1. If you quickly want to reference the documentation, you can toggle tag 3 to have both editor and the docs side-by-side. Now you want to compile and switch to tag 2. Now only the terminal is on your screen. You compile but notice you have an error. You toggle tag 1 and now have your editor and your terminal with your compiler error side-by-side, allowing you to quickly find the bug. Compiling succeeds, so you toggle tag 2 and only your editor remains on the screen.
Dealing with multiple Outputs
We are still working on making using multiple outputs more comfortable in river, but it is already supported pretty well and very usable.
Every output has its own set of tags and its own window stack. This means you can treat different outputs effectively as separate desktops, almost as if you had multiple instances of river running.
There are two actions you need for working with multiple outputs, focus-output and send-to-output. Both of them can take either a logical direction or physical direction. The logical directions are next and previous, allowing you to target the next or previous output in the output list, wrapping at the start and end. This tends to be great for setups with only two outputs, where either direction effectively just means "the other output". The physical directions are up, right, down and left. They are useful for complex setups with more than two outputs.
Although disabled by default, river supports warping your cursor to focused outputs. Use the set-cursor-warp action with the parameter on-output-change to enable this setting.
New outputs are automatically attached in the global output layout to the right of the right-most output. If you want to change the output layout, you will need to use a client for the wlr-output-management protocol extension.
For non-persistent output configuration, I can recommend two tools.
The first one is wlr-randr, a simple but solid CLI program that tries to imitate xrandr interface.
The other one is wdisplays, which makes use of GTK to offer a very nice graphical interface to change all relevant output settings. Unfortunatly the original developer appears to have deleted their online presence, including the original repository. Fortunately, there appears to be a maintained fork.
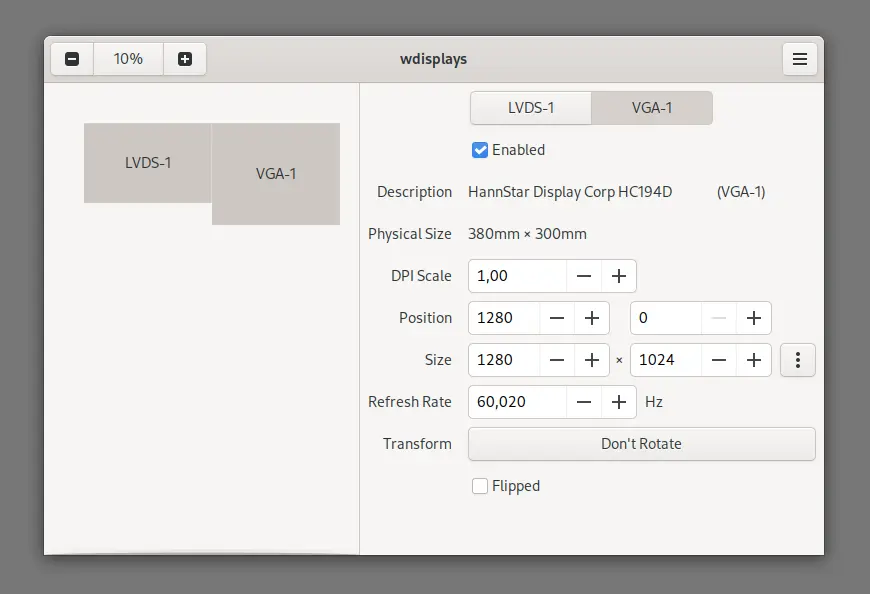
For persistent configuration, the obvious choice is kanshi. Not only does it offer persistent output configuration, it does so using multiple profiles which it can automatically switch between based on the currently connected outputs. And since outputs can be identified both by their connector (like "HDMI-A-1") and also by the name and model number of the physical device (like "Lenovo Group Limited 0x4011 0x00000000"), you can create profiles both for known setups and unknown setups.
kanshi is pefect for laptops that are often connected to external screens. If you are like me and use your laptop at home with an extra monitor, over at a friends place with their TV, at university with that one specific projector and also often with a bunch of random additional outputs, kanshi allows you create configuration profiles for all these scenarios. Since it switches between them automatically, you don't even need to think about it. And it does not conflict with the two other tools I mentioned above, so you can make non-permanent adjustments live if necessary.
Appearance
Changing rivers appearance is trivial. You only need to choose three colours, background colour and border colours for focused and unfocused windows, as well as the thickness of window borders. River has an action for each of these settings.
The format of colour codes accepted by river is 0xRRGGBB for RGB colours (no alpha) and 0XRRGGBBAA for RGBA colours (with alpha).
riverctl background-color       0xAB5D1C
riverctl border-color-focused   0xE7CA70
riverctl border-color-unfocused 0x672008
riverctl border-width           3
If you want to set a wallpaper, you need an external program for that. A common one is swaybg. This will work different than what you may be used to from X: swaybg is a long-running process instead of a one-shot command. Wayland has no root window you can write image data too, instead think of swaybg as an image viewer that spans the entire output and always is in the background "below" all windows. The following shell snippet will start it only when the wallpaper file actually exists.
[[ -e ~/.config/wallpaper.jpg ]] && riverctl spawn "swaybg -m fill -i ~/.config/wallpaper.jpg"Configuring the appearance of the applications you use is more involved and depends on what you are using.
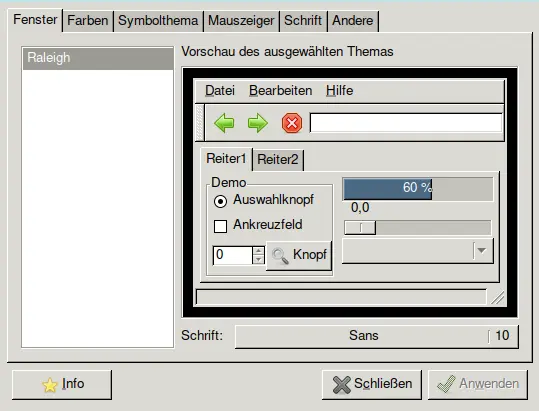
There are multiple theme switcher programs that allow you to modify the global appearance, but most of them are pretty integrated into their respective desktops. A universal one is lxappearance, but I found it does not work at all with modern GTK, failing to find and set any installed themes. Literally even the default theme, Adwaita, is missing from its selection.
Since lxappearance does not work and since I could not find any replacements, I'll quickly point out how to change the appearance of common applications via commands.
For GTK applications, you need to know the exact name of the GTK theme and the icon theme.
gsettings set org.gnome.desktop.interface gtk-theme Adwaita
gsettings set org.gnome.desktop.interface icon-theme Breeze
On Wayland both client and server set the cursor theme, so you need to configure it for both.
riverctl xcursor-theme tarazed
gsettings set org.gnome.desktop.interface cursor-theme tarazed
Clients using lib-wayland-cursor get their cursor theme from the $XCURSOR_THEME env var, which you need to set before launching river if you want to change it.
River by default uses server side decorations for all windows. This mean river will draw a border around the window and tell clients to adjust their rendering accordingly. However, if you like client side decorations, you can enable them on a per-window basis using the csd-filter-add action, both for tiled and floating windows.
Interoperability and Integration
Alongside Wayland, a new thingy for application interoperability emerged: XDG Desktop Portals.
Basically if a program wants to open a file selector, record the screen or reach out of its bubble in any other way, it does not do that itself, but instead asks the portals service. The portals service will than use a few helper services to do the requested action. The idea is that applications can integrate well with the desktop, to allow them to do things natively.
While in theory you could probably ignore portals if you do not need any of that, there is an annoying bug in GTK causing all GTK application to stall for twenty seconds while launching when they can not connect to the portals service. Usually when the portals service is not running, it will be automatically launched by DBUS when something tries to connect to it. But since DBUS does not pick up river as a graphical session, that will not work without setup.
To correctly setup DBUS autostarting for services, you can either launch river with dbus-launch or, if you are using systemd, simply configure the DBUS environment in your init with the following shell snippet. This also has the side-effect that systemd will also be aware of your session, which can help with user services.
riverctl spawn "dbus-update-activation-environment --systemd WAYLAND_DISPLAY XDG_CURRENT_DESKTOP=river"
riverctl spawn "systemctl --user import-environment WAYLAND_DISPLAY XDG_CURRENT_DESKTOP=river"
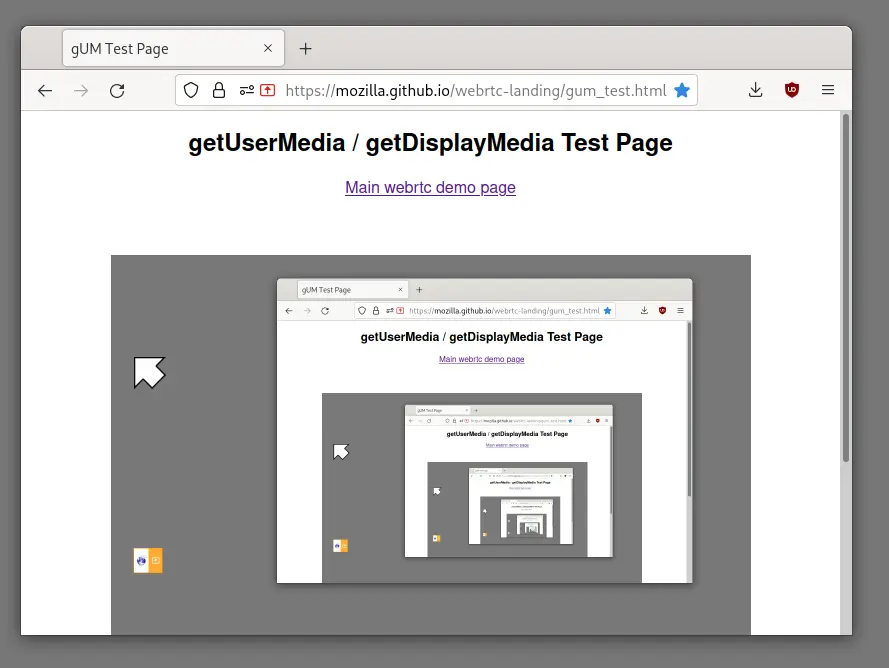
If you want to allow screen recording in river through portals, you will need to install xdg-desktop-portals-wlr. You can test whether it works using mozillas gUM test page.
Another important program for interoperability is xdg-open, which pretty much every graphical application will use to open pretty much everything. It uses a database to automatically figure out the best program to open the provided path or URL based on MIME type. It usually works fine, but sometimes if you use uncommon applications, it can get a bit confused and you will have to configure it yourself. That however is a pretty involved topic that is covered pretty well by a bunch of other sources already, so I will not include it here.
And finally, GTK likes to be special. So you might need to set the GTK default applications, for example if you want the "open in terminal" context menu entry in graphical file managers to work. For that you will need to know the name of the .desktop file of your applications.
gsettings set org.gnome.desktop.default-applications.terminal exec alacritty.desktop
Useful Programs and Widgets
To complete your river experience, you may want to use additional programs and desktop widgets. This here shall be a curated list of such utilities which are known to work well with river. Before we start, I believe it is important to mention that the application suites of the big two desktop environments (KDE and GNOME) can be used on river perfectly fine. I myself use gnomes file manager, image viewer and document viewer. As such, this list will mostly focus on areas not already covered by these common application suites. I'll also skip applications that are already popular; Nobody needs to be told about mpv.
Terminal
The most important application is of course the terminal. The terminal that seems to be most common among river users is foot. It is very fast, both to startup and in use, and efficient. Its repository even includes a decent collection of pre-configured themes you can just paste into your config file. But the configuration file uses the simple INI format, so it is no challenge to use other themes as well. As you can see in the attached screenshot, it also supports sixel!

Other terminals that are known to work well with river are alacritty, kitty and gnome-console.
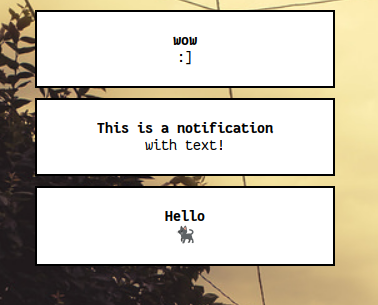
Notifications
One of the most important widgets is probably a notification daemon. My preferred one is mako.
Mako can be controlled with the makoctl utility it ships with. As an example, here is how to use it to dismiss notifications with a global keybind.
riverctl map normal Mod4 Escape spawn "makoctl dismiss"Other notification daemons you can use are dunst, which recently gained Wayland support, and fnott.
Status Bar
Arguably the most common status bar in the wider biotope of wlroots based Wayland desktops is waybar. It uses GTK with custom CSS, which allows a high amount of visual customisation, at the price of having to deal with its horrendous configuration. Waybar has a high amount of built-in status modules you can make use of, including one for rivers tags, mode and title of the currently focused window. From what I can tell it tries to be the Wayland version of a common status panel for X11 called polybar.

Another good alternative is sandbar, which mimics the built-in bar of dwm. It displays river tags, active mode, layout name and title of focused window. Optionally it also displays a status via stdin.

Yet another bar is levee, which has arguably the simplest configuration of all status bars features here. I like the centered clock.

I personally do not use a status bar, so I created river-tag-overlay to keep track of tags. It's a little pop-up that appears whenever you change the active tags.

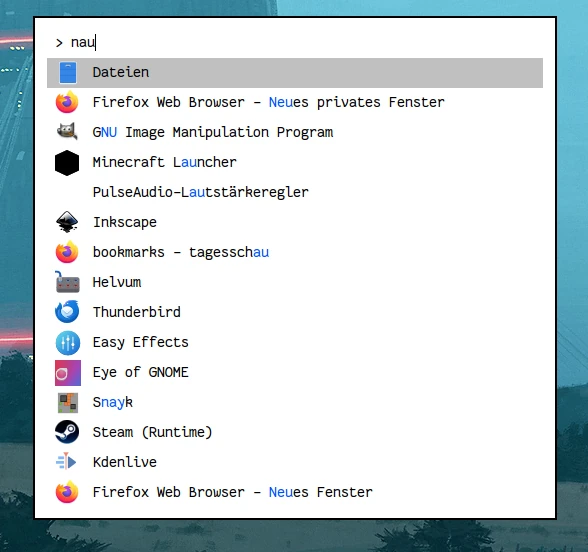
Launcher
A good way to launch applications are search based application launchers, like fuzzel. It shows you a list of all installed applications, which you can quickly launch by typing their name and pressing enter. Fuzzel can even be used as an interface for scripts, allowing you to create useful things like an emoji picker.
Screenshots
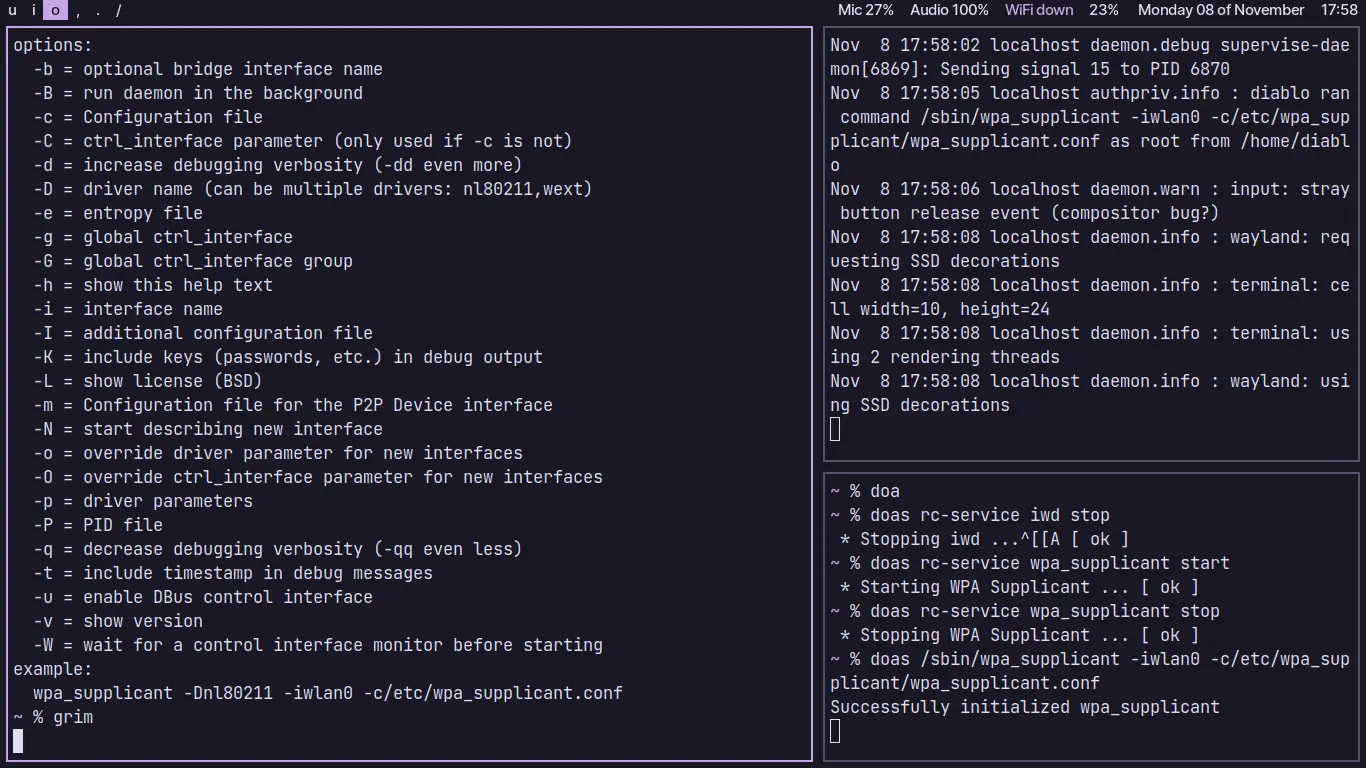
If you were wondering with what program I took all the screenshots in this article, check out grim, a simple no-fuzz CLI screenshot taker. By default it just takes screenshot of the entire screen, but it integrates with slurp, allowing you to interactively select rectangles on your screen.
grim -g "$(slurp)" out.pngGrim can also send the image down a pipe instead of just writing it to an output file, making it very versatile.
This snippet here combines grim, slurp, awk and ImageMagick to create a colour picker.
grim -g "$(slurp -b '#00000000' -p)" -t ppm - | convert - -format '%[pixel:p{0,0}]' txt:- | awk 'END{print $3}'And this snippet will decode all QR-Codes visible on screen.
grim - | zbarimg --quiet -Screenlocking
If you want to lock your screen, you can use either swaylock or waylock. If you build and install them from source, don't forget the PAM setup!
To automatically lock the screen after a certain amount of idle time, use swayidle. It can also run other commands on idle. For example you may want to turn off the screen after some more time, which can be done with wlopm.
Miscellaneous
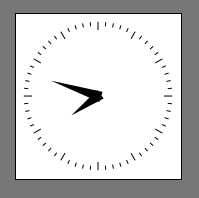
Are you a classy person, missing some of the fancy desktop widget of the old days of X? Worry not! Since I have issues too much free time, I have recreated some of them for Wayland! wlclock is a reimagining of xclock. A digital analog clock for your desktop. wayneko brings the classic digital companion back to your screen. Nekos friend Inu is also included. wayloadmon shows the recent system load in a scrolling bar chart, similar to xloadmon.


Gallery
You made it to the end! Firefox's reader mode on my machine estimates an average reading time of about 50 minutes for this article, so this is no small feat! As you can imagine, writing this piece was even more of a chore, which is my excuse for finishing it about two and a half weeks late.
Anyway, let's finish this off with a few more pictures. I asked over on #river if people would like their screenshots to be featured here and these are the responses I got. Except the first one, which is a screenshot of me editing this article.